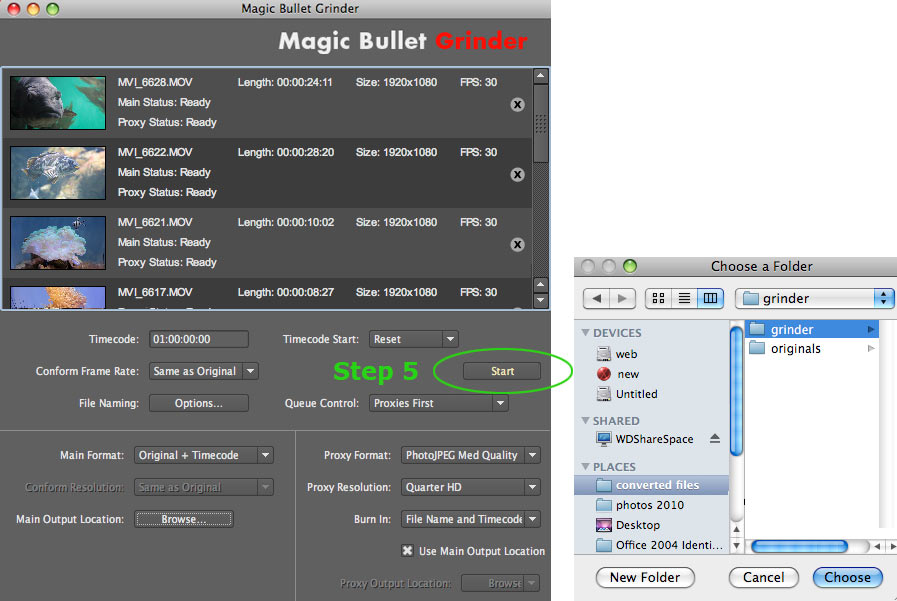
Step 5: Start batch process
Click the Start button to begin processing the files in your Batch Queue. You will be asked to choose the Save location for your newly converted files.
Processing your files
Grinder will process multiple files simultaneously. Its performance is dependent upon the number of cores available on your machine.
The queue options apply to the whole queue at once; you can't attribute options to single items. As your files process, the Start button changes to a Stop All button, allowing you to cancel the processing of all clips.
What the readout shows
There are three lines of information presented for each file in the batch list. Each line has a thumbnail showing the first frame of the file.
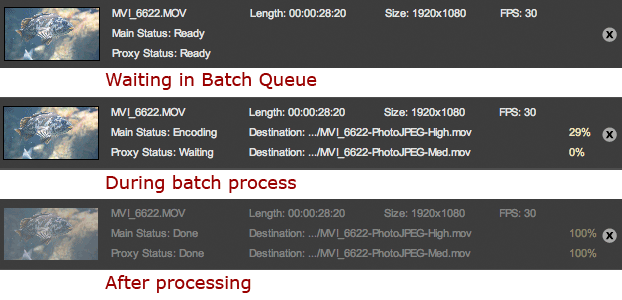
Line 1, File Specs. Shows a readout of the file characteristics: The file name; the Length or time of the clip; the Size or dimensions of the file; the Frame Rate (FPS).
Line 2, Main Status. The status of the Main Format output. This will read as: Writing Main, Waiting, Complete, Destination (as a truncated file path), and Percentage Completion. You can stop individual outputs by clicking that row's Cancel button.
Line 3, Proxy Status. The status of the Proxy Format output. This will read as: Writing Main, Waiting, Complete, Destination (as a truncated file path), and Percentage Completion. You can stop individual outputs by clicking that row's Cancel button.
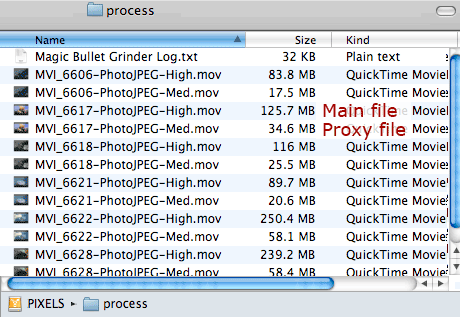
Your Grinder output
When the Grinder process is complete, the files for the current batch are hidden. You can show old batch items with the Show Processed Files command in the Options menu.
Your main and proxy files have been saved in an easy-to-edit format. A Grinder Log text file gives you the date, file name, and the time it took to encode.
![]()
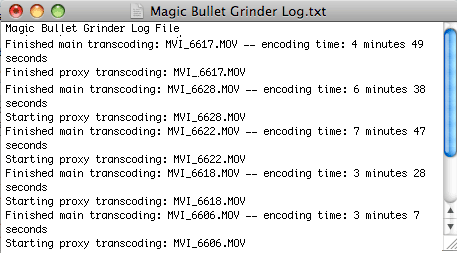
Left to right, the processed files and the Grinder log.