LooksBuilder: Tool Chain
The Tool Chain is the heart of PhotoLooks. Each part of a traditional graphics pipeline is represented by a section of tools in the Chain. The Chain resembles a virtual camera, from the subject (in front of the lens), through the camera itself, to the post-production process (after the camera).
Tools are processed from left to right, following the same path as light through a real-world cinematography workflow. This means that the tool that is left-most in the Chain gets applied to your image first. Then the tool to its right gets applied, and so on until the right-most tool has been applied.
![]()
The Tool Chain without tools loaded.
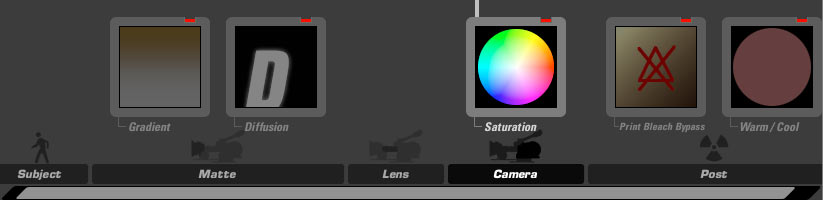
The Tool Chain with tools loaded. There are two tools in the Matte and Post areas; one tool in the Camera area; and no tools in Subject and Lens areas.
Add Tools to the Chain
There are a few ways to add a tool to the Tool Chain.
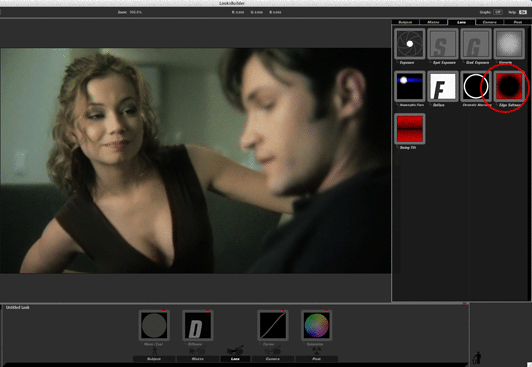
![]()

Choose a tool from the QuickDrawer, then drag the tool over the Preview Area or Tool Chain. The tool will appear in the Chain with overlays and controls ready for editing.
Positioning the Tool in the Chain
The Tool Chain shows large icons that represent each of the tools that are altering the image and creating the overall look. Many tools can appear in multiple areas but by default, Tools that are dragged or double-clicked in the Tools QuickDrawer appear in their assigned area in the Tool Chain.
For instance, clicking the Post area in the Tools QuickDrawer and dragging an Exposure tool into the Tool Chain will naturally put the image into the Post area, making its effect come last after all other tools. If the same tool is added from the Post category with a double-click then it will appear at the END of the respective area after any tools already in the chain.
IMPORTANT: For power users who have a reason to change the default ordering of tools, you can Alt-drag (Windows) or Option-drag (Mac) the tool. This places the tool into any part of the Tool Chain regardless of its natural place in the Tool Chain. This reorganization can be useful for situations like placing a Spot Fill tool in the Post area to lighten the shadows slightly after all other operations. Remember, you don't need to use this option to create great color design, but for users who find they need a tool in a certain place, then Option/Alt-drag is ready to break the Tool Chain
Tool On/Off Switch
Each tool in the Tool Chain has an On/Off switch that toggles its effect. Tools are switched On by default. When turned On, the tool is part of the active chain. When turned Off, a Tool doesn’t affect the image in any way. You can save a Look or a Session with tools that are switched off.
Shown below are two tools in the Tool Chain. The red dash of the tool at right indicates the On state. The black dash of the tool at left indicates the Off state. To switch the tool's state, just click on the dash.
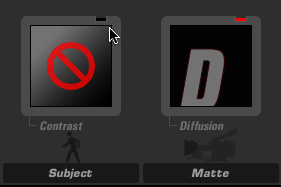
The red dash indicates an On state.
Tool Chain On/Off Switch
You can enable or disable all of tools in the Tool Chain area by clicking the red On/Off button at top right of the palette. This button is also called the Bypass Switch because it can tell LooksBuilder to 'bypass', or ignore, tools that are loaded in the Tool Chain.
A red dash in the Bypass Switch indicates the On state. Turning the chain On activates the tools and displays the current image with a processed look.
A black dash indicates the Off state. Turning the chain Off shows a preview without any tools. In the screenshot below, the Bypass button is turned Off (it is black, not red), and the individual tools will be disabled even though their individual tool switches are still On (set to red).
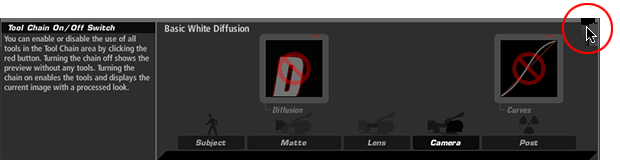
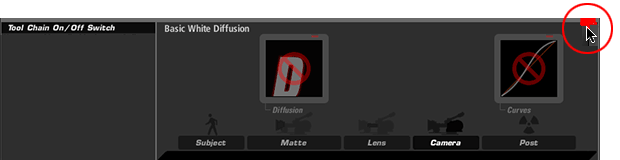
Above, the Bypass Switch is black and Off, which disables all tools. Below, the Bypass Switch is red and On, which enables all tools.
Changing the Look Name in the Chain
The name of the current Look preset is shown at the upper right of the Tool Chain. When a Look is applied or No Look is chosen, the name label will display as 'Untitled Look'. Double-click the name to enter edit mode. Clicking Enter again will create a new preset look with your custom name in a new category called Custom Looks. If a preset is altered by changing Tools or Tool values, then the name will revert to Untitled Look.
![]()
Renaming a Look.
Delete a Tool with the Trash
To remove a tool from your Look, just drag-and-drop the tool from any Tool Chain category over the Trash Can icon. When you release the tool, it gets deleted. If a tool is selected, you can also use the Delete (Del) or Backspace key to remove the tool.
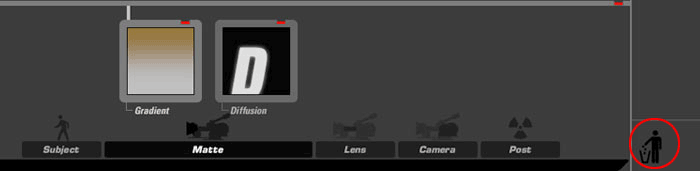
Two tools loaded into the Tool Chain.
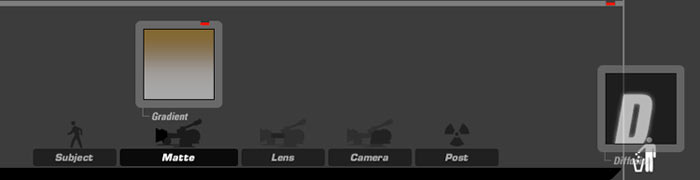
One tool is deleted by drag-dropping in the Trash.