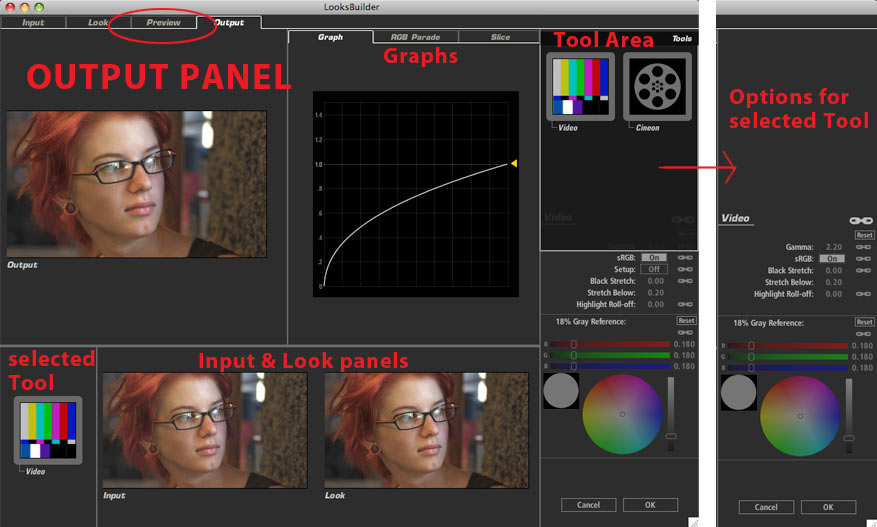
LooksBuilder: Advanced I/O Processing
Input/Output Processing is enabled in the LooksBuilder Preferences Panel. Choosing the Advanced optiion from the I/O Processing pop-up activates a tabbed interface. The default Looks area becomes one of four panel views, with Input, Preview and Output panels all activating.
Each panel includes three interdependent views: A large image of the current view (Input, Preview or Output) and two smaller views of the other two. Controls at the right allow you to change color settings, and your changes are reflected in a Graph panel whose tab is added with the RGB Parade and Slice Graph panels. More about Graphs on this page.
Technical Note: The internal color model of PhotoLooks is radiometrically linear, so all video footage is converted to a 1.0 gamma from the presumed 2.2 default before being processed, and back to 2.2 when output. Advanced Input/Output Processing gives you extra control over this conversion process, with an Input panel where you control how it is interpreted on input, an Output panel to specify output settings, and a Preview panel for cases where footage does not display properly to adjust the Look – Cineon log footage being the prime example.
Default mode shows only the Looks panel.

Advanced mode keeps the Look panel and opens the Input, Preview and Ouput panels.
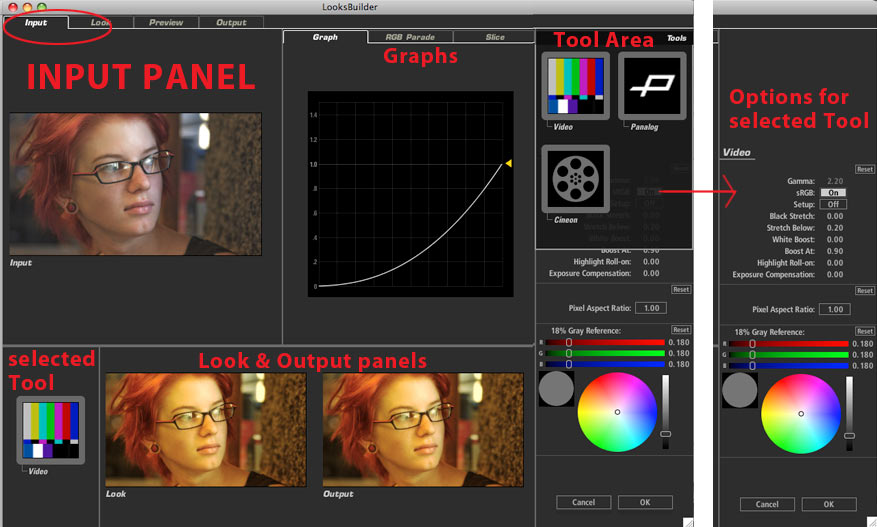
Input Panel
The Input Panel is one of three advanced panels that open up. Here is what you will see. The Tools Drawer pops up in the upper right corner and includes three Tool Area choices, Video, Panalog and Cineon. Video is the default, displayed in the lower left corner as active. The adjustment settings on the right will change according to the tool you choose, as will the default adjustments.
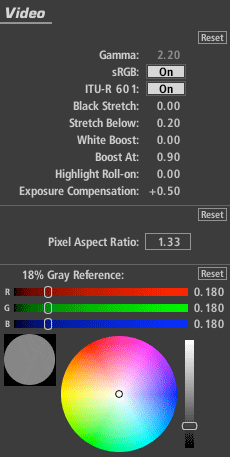 |
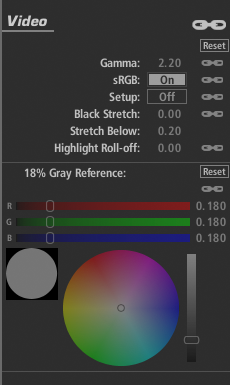
Input Panel> Video Tool Video is one of three tools that can be chosen in the Input Panel's Tool Area. It is selected by default. The Video options can be changed to reflect a variety of advanced linearization options to boost blacks or extend whites in the image to match a custom transform curve.
|
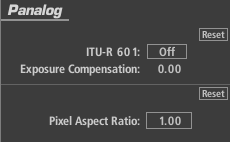 |
Input Panel> Panalog Tool Panalog is one of three tools that can be chosen in the Input Panel's Tool Area. This transform uses a fixed table that is suitable only for media that has been brought in as raw Panalog data from the Panavision Genesis camera.
|
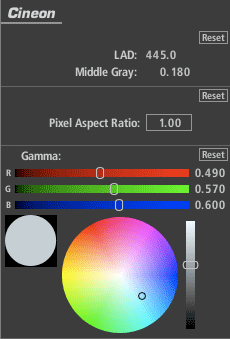 |
Input Panel> Cineon Tool Cineon is one of three tools that can be chosen in the Input Panel's Tool Area.
|
Output Panel
The Output Panel has two output choices: Video and Cineon. Video is the default, displayed in the lower left corner. The adjustment settings on the right will change according to this choice, as will the default adjustments.
 |
Output Panel> Video Tool Video is one of two tools that can be chosen in the Output Panel's Tool Area. The Video Output panel shows an inverse curve from the input and reflects the opposite adjustment to return the output to assumed gamma of 2.2.
|
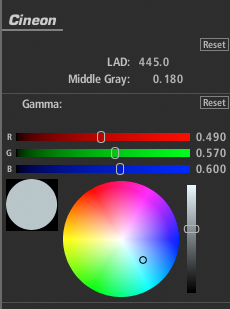 |
Output Panel> Cineon Tool Cineon is one of two tools that can be chosen in the Output Panel's Tool Area. The Cineon Output panel is chained to Cineon Input settings by default. Click the large chain icon at the top to allow other chains to be toggled off.
|
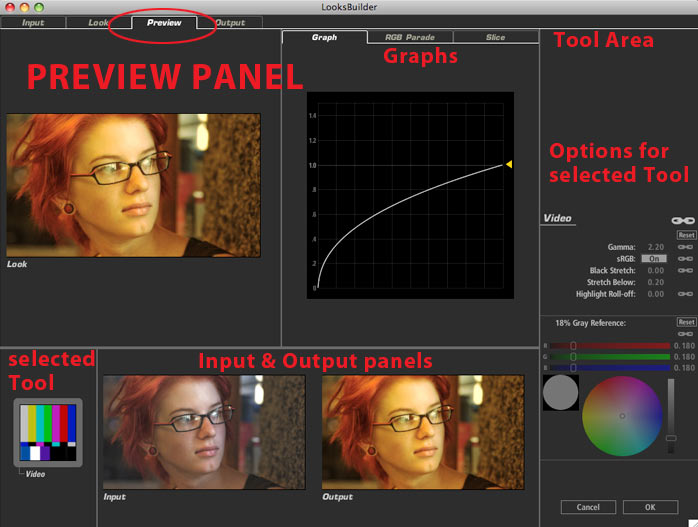
Preview Panel
The controls in the Preview Panel contain chain icons. By default, Preview settings are chained to those of the Output panel. You can un-chain any of these settings and alter the way footage looks as you work in the Look panel (without changing the output appearance). This is useful with images that do not natively display correctly for color correction.